With everything that has been going on as of late, it is safe to say that Zac and I have been feeling a bit overwhelmed and stressed out. It was Zac’s birthday this past weekend and yet, life still had to press forward as we only have about 10 weeks left until we are due to move to our land and a mere 12 till we are supposed to begin our build…. and there is soooo much left to do! Did I mention that there’s a ridiculous amount left to do?! Anyhow, Zac went out to do some pick-ups from local families for our build this weekend and was energized by speaking to other like-minded individuals. He dropped everything off at our land and took care of some miscellaneous tasks there before coming home yesterday to make our first bottle bricks! HOORAY for bottle bricks (more on this below).
While he was making pick-ups and dropping everything off at the land, I was taking care of Skunk-master (Elliot) and looking for suitable work boots so that I can be at the land with Zac more often. While Skunky was taking his 3 hour nap yesterday (Huzzah!), I was able to work on our EPA beneficial use of tires application, make to-do lists of places to call for fill-dirt and used car tires, source out some local sheds for sale and gorge on the latest issue of Mother Earth News (MEN from here on out). Let’s just say that reading that issue put our future in perspective as I found myself marking every page is “IMPORTANT” and got myself so worked up about our future garden, our future chickens, ducks, geese, goats, making vinegar, etc. that I nearly exploded with excitement!
Thus, it was making bottle bricks and reading MEN that turned our weekend around for the better and served to put everything into perspective for us.
We were so excited about our bottle bricks, that we created a “how-to” video about making them for anyone else interested in using these super easy “bricks” for a stained glass effect. The full length video is at the close of this post but here are some stills that will break down the process for you as well:
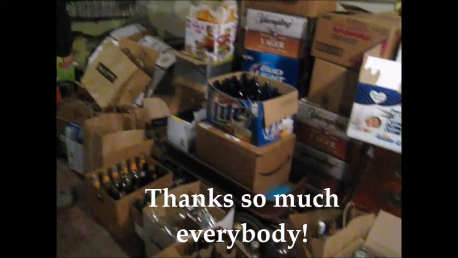 |
| Only a tiny glimpse into the mountain of glass jars and bottles that are taking over our basement (every box is completely full!). We decided it is time to begin making bottle bricks in our spare time to save on space. We are still taking any glass bottles and jars you all may have as we will need A LOT of bottle bricks for our project! Thanks so much for everything so far family and friends! |
 |
| Completed bottle bricks!!! |
 |
| Zac in our "kill room"... yeah, we're fans of Dexter :). We have covered the room in plastic so that the bits of glass can more easily be cleaned up and seen. A wet ceramic tile saw is used to cut glass bottles to make the bricks. This one was one of the cheapest out there (at about $50 after coupons and discounts) and can be found at Harbor Freight... you don't need anything expensive for this task. He is wearing a long sleeve sweater to cover his arms from the glass bits and is wearing cut-resistant gloves as well as an apron, dust mask, protective eye wear and a face shield (we're responsible for Skunk-master now... we're kind of important these days and need to protect ourselves... haha). |
 |
| Zac demonstrating how to line the bottle up on the wet ceramic tile saw. We are creating 8-inch bottle bricks for an 8-inch thick wall, so we've set the guide for 4 inches as one bottle creates half of a bottle brick. You can use two bottles or jars whose bottom circumference is roughly the same. The bottles can be the same color or two different colors as every combination creates a unique effect when held up to the light. |
 |
| You place the end of the bottle against the guide, turn on the saw, and gently move it toward the revolving blade; stopping once you've pushed it approximately half an inch into the blade. Then, you easily rotate the bottle toward you; letting the saw do the all the work. |
 |
| Once the bottle is cut, each part can be swirled around in water and placed somewhere to dry. The glass bits still remaining on the bottle fall to the bottom of the bucket (we're going to save all the shiny glass bits for use in a resin countertop or table top to create a unique effect!). |
 |
| The remaining parts of bottles and jars that have been cut. We're looking for creative ways to reuse these so please comment if you have any ideas! Also, if you could use them for a project, let us know and we'll send some your way. |
 |
| Once you have two like ends cut, we've found it is easiest to place them together and use your knees to pinch them while preparing the duct tape. |
 |
| Then, you simply roll on the duct tape; securing one end to the other. Once you've wrapped duct tape around the two bottles, voilà, you have a complete bottle brick! |
Here is the full-length step-by-step video on how to make bottle bricks:


Comments
Post a Comment